
If you just bought a Philips voice tracer DVT1110 but don’t how to delete your recording, this is a quick guide. And we will show you how to delete a single recording file and how to erase the whole file folder directly on the Philips voice tracer DVT1110.
1. How to Delete Individual Recordings
To delete a single recording file, the first thing is to find the file folder where the recording file locates. (If you have many files and are not sure where the recording file is, you can browse all files on your computers to delete them.)
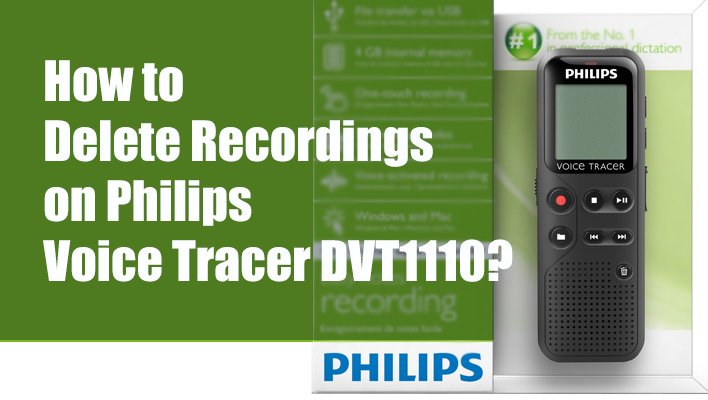
Step 1. Press the “File Button” to choose the file folder. (Your Philips DVT1110 voice recorder has 4 file folders – A, B, C, D. And they are on the upper left corner)
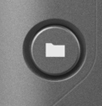
Step 2. After selecting the file folder, choose the recording file that you want to delete by pressing the “Previous/Next Arrow Button“, and you will see the recording number changes. (You can try to playback the recording before moving to the next step so that you won’t accidentally delete a wrong recording.)
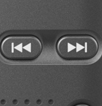
Step 3. Now you can press the “Trash Bin Button”, and the screen will show “dELONE” (If it shows “dELALL, just press the “Previous/Next Button”.)
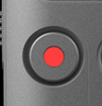
Step. 4 Confirm and delete the recording by press the red “Recording Button”, and the recording is removed.
2. How to Erase a Recording File Folder
When it comes to erasing a whole folder, the steps are even easier. So make sure you are selecting the right file folder while deleting since deleted files can not be recovered
Step 1. Press the “File Folder Button” to select the folder that you want to delete.
Step 2. Press the “Trash Bin Button” to delete files or a folder.
Step 3. Press “Previous/Next Arrow Button” and choose “dELALL” to erase the file folder.
Step 4. Press the red “Recording Button”, and the file folder will be deleted.
3. How to Delete All Recordings and Files? (Formatting)
To do the memory formatting, make sure there is nothing to back up in your Philips voice tracer DVT1110 as it will delete all recordings and files folders.
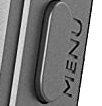
Step 1. Press the “Menu Button” for two seconds. (The Menu button is on the right side of the device)
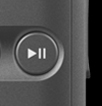
Step 2. Press the “Play/Pause Button” to enter the “Format” function. (Don’t choose “Restore, it will not delete files)
Step 3. Press the “Previous/Next Arrow Button” to select “OK”
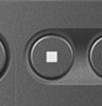
Step 4. Exit the menu and return to normal mode by pressing the “Stop Button”
4. You Can Also Use a Computer to Delete Files
Just like a regular USB device, you can also delete or add files to your Philips DVT1110 voice recorder by connecting it with your computer. You can conveniently view your file folders and recording files on a PC.
Deleting files on a computer does not need you to select the files one by one, and you can quickly copy and review your recordings before deleting them. If you have some important recordings that you don’t want to lose, using a computer or a laptop to delete files is the most secure way.


I tried multiple times to delete previous recording that I no longer need by following the steps above and it doesn’t work. Other than this issue, I like this recorder. But, I may have to get another one that I can actually erase the recordings.
happened to me too. I can erase the recording but it starts recording again and again
Thank you so very much! This was so helpful.
I found that you have to hold down the delete button for a few seconds, and then hit the record button to delete/